Exporting from Intellibook to MailChimp
Did you know?
- You can create segments within Mailchimp to allow you to create automatic "sub-lists" within the wider list you've imported. For example, you could create a list called "VIP Subscribers" which are driven off the VIP field in Intellibook. Or "Attendees with an outstanding balance" etc.
If you map financial fields like "Payments", "Current Balance' etc. and you want to create a segment based on these it pays to import them as a "number" field instead of a "text" field. This way, you can create a segment based on rules such as "records with a current balance greater than 0" etc. - You can re-import the Booking CSV later on and automatically update existing records without having to map the columns again etc. This is useful if you're relying on information which might change - e.g. financial figures like payments, balance outstanding etc.
Export Procedure
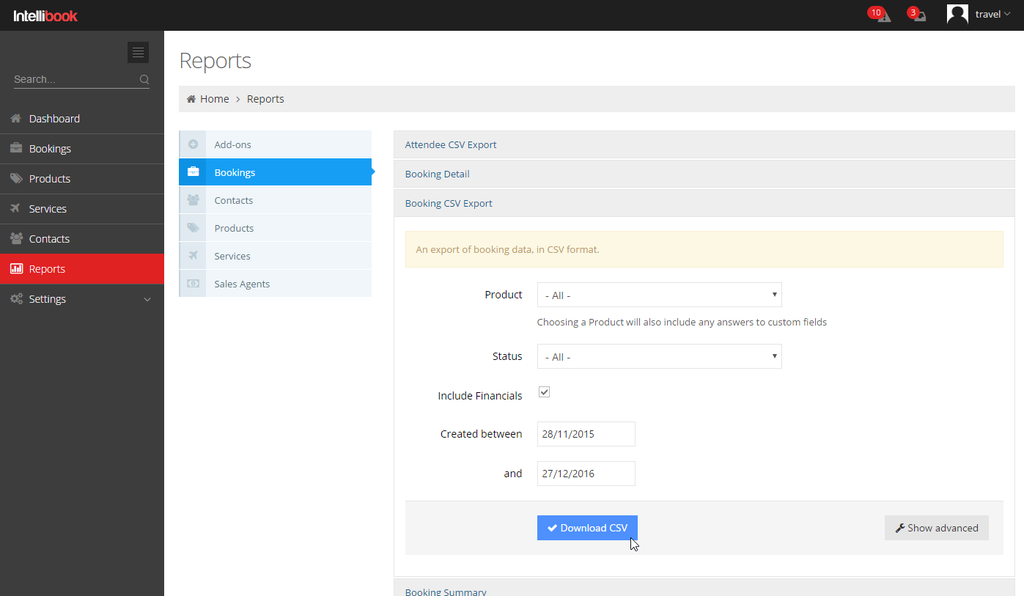
Export booking contact details using the Booking CSV Export from Intellibook:
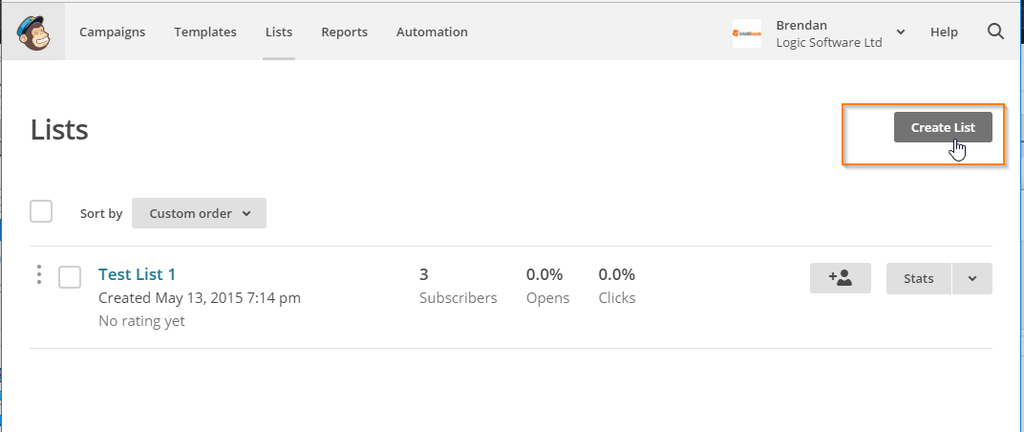
Log into Mailchimp and create a List:
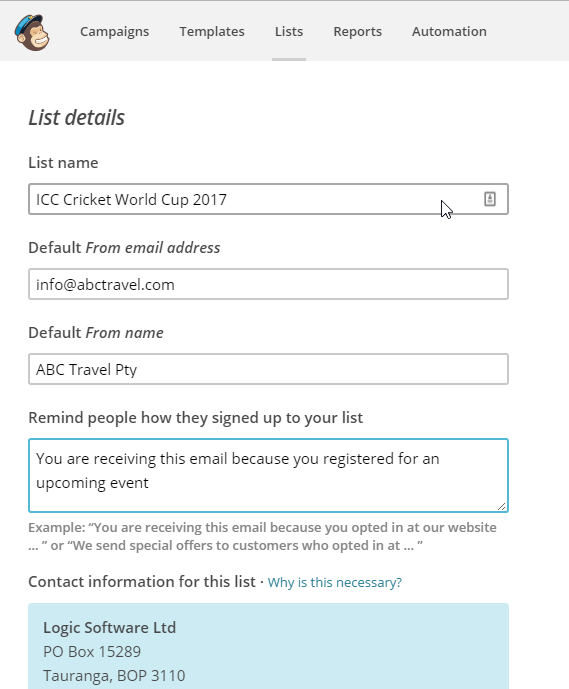
- Fill
out the details as appropriate for your event (or specific purpose - such as
payment reminder etc.):
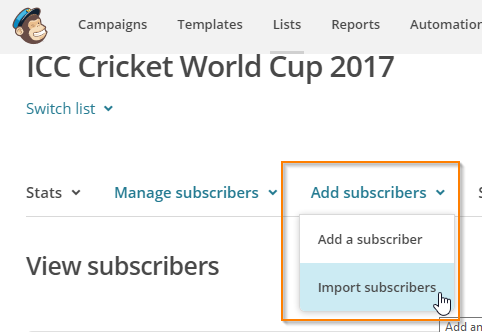
With the new List open, click the "Import subscribers" action:
Choose the "CSV" option and click "Next" at the bottom-right
Browse for the booking CSV file you produced from Intellibook and click "Next"
In the next step, choose the fields from the CSV you're interested in making use of in your email campaign and import these as "text" type fields. For example, if you want to personalise emails by inserting the Booking ID from Intellibook in the content, you should import this field - to do so, open the "Column name" dropdown and choose the "Create a New Column > New column name" option from the list, unless an appropriate option already appears in the list.��
Make sure to import the "ContactFirstName" field as "First Name", "ContactLastName" as "Last Name" and "ContactEmail" as "Email".�
You can elect to "skip" (or just don't touch) any fields which you're not wanting to use.Click "Import" on the last screen to add the records from your CSV file to the subscriber list.
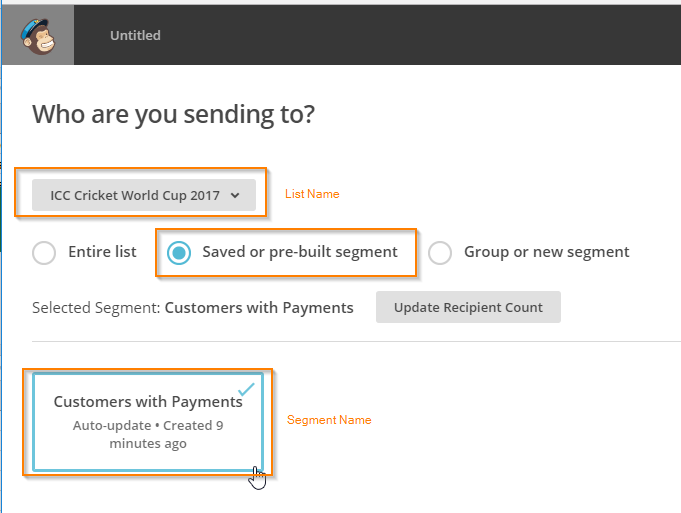
Once subscribers are imported, you're ready to draft an email Campaign using that list as recipients, for example:
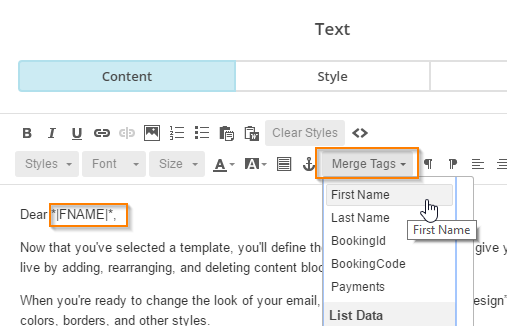
- When
it comes to Personalising an email campaign using fields imported from the
Booking CSV, it pays to use the "Merge Tags" dropdown as follows:
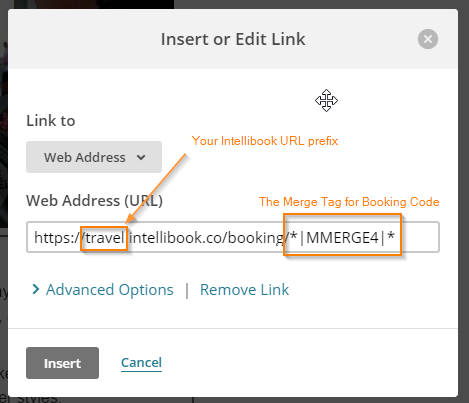
A slightly trickier example is forming a Customer Portal link.
First we need to figure out the appropriate "Merge Tag" to use for the "BookingCode" (or whatever name you gave it in Step 6). Start by clicking on a new line in your email and using the "Merge Tags" dropdown to click on the BookingCode field. It will insert a Merge Tag like *|MMERGE3|* or *|MMERGE4|* etc. You'll use this in the following steps.
Next you can start creating the link to click in the email like below: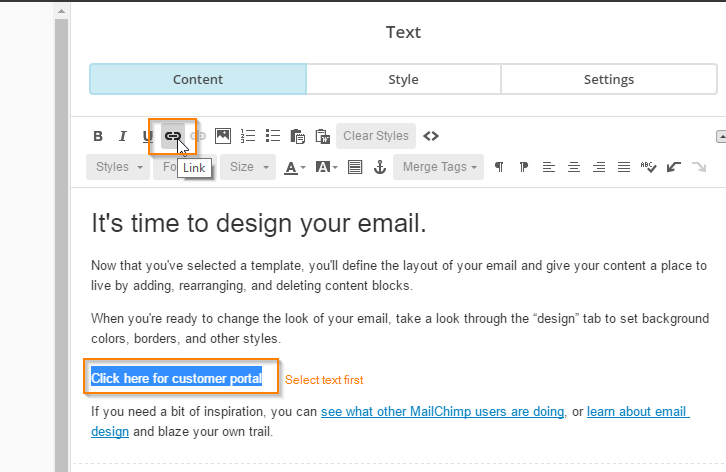
Then enter a URL as follows, but where the booking's code would normally appear in a customer portal URL enter the appropriate merge tag like this: